
Setting Up the Microsoft Intune Connector
Note: Currently only a Customer (1 to 1) Connector can be established in the platform.
Tip: If you have created a Microsoft Entra Connector, you can use the same credentials for the Microsoft Intune Connector for the same customer.
Prerequisites
Before setting up the connector, ensure you have:
- A Microsoft account with Application Administrator or Higher (such as Global Admin) role permissions for your Azure tenant
Step 1: Log in to the Azure Portal
- Go to: https://portal.azure.com
- Open Microsoft Entra ID
- Select "App registrations"
- Select "New registration"
Step 2: Register the Application
- Enter the following values:
Name:
Paratira - Connector - Entra & Intune
Supported account types:
Accounts in this organizational directory only (Single tenant)
Redirect URI (Web):
https://paratira.ai
Select "Register".
Step 3: Record the Client ID
Record the following information after selecting register above, to be inputted into the Paratira Platform later.
Application (Client) ID
Step 4: Create a Client Secret
- Go to "Certificates & secrets".
- Select "New client secret".
- Choose an expiration period.
Important policy note:
Select the longest lifetime permitted by your organisation’s security policy.
When the secret expires, the connector will stop functioning until the secret is rotated, so ensure secret expiry monitoring and renewal processes are in place.
- Select "Add".
- Copy the Client Secret value immediately and store it securely. The value cannot be retrieved once you leave the page.
- You will need to input the Client Secret into the Paratira Platform later.
Step 5: Add Required API Permissions
Microsoft Graph - Application permissions:
- AuditLog.Read.All
- Device.Read.All
- DeviceManagementManagedDevices.Read.All
- Directory.Read.All
- Organization.Read.All
- Reports.Read.All
- SecurityEvents.Read.All
- TeamworkDevice.Read.All
- User.Read.All
Microsoft Graph - Delegated permissions:
- User.Read
Select "Grant admin consent" and save after adding the permissions.
Step 6: Identify the Tenant ID
- Go to: https://portal.azure.com/#view/Microsoft_AAD_IAM/ActiveDirectoryMenuBlade/~/Overview
- Copy the Tenant ID to be inputted into the Paratira Platform later.
Step 7: Log into the Paratira Platform
- Go to: https://app.paratira.ai
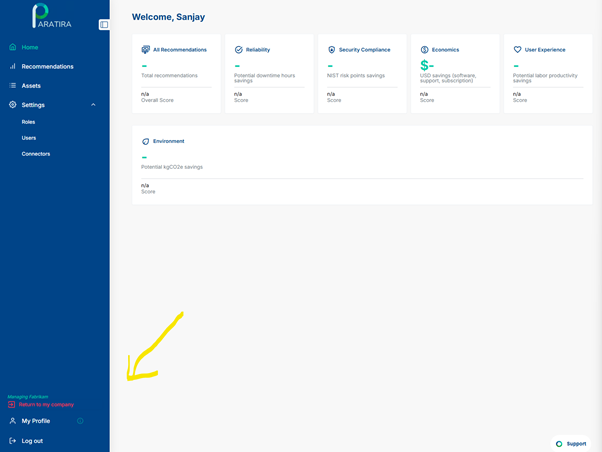
- Ensure Customer Impersonation
The screenshot below shows where you can check that you are correctly "Managing" or "Impersonating" the customer profile you wish to setup the connector for:
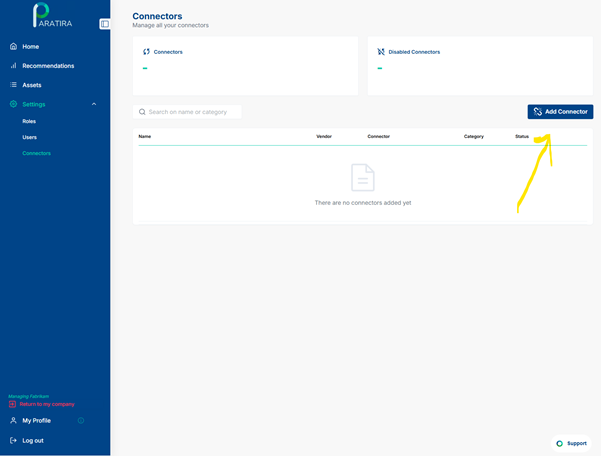
Navigate to Settings in the left menu
Expand the menu and select Connectors
Click the Add Connector button
The screenshot below shows the location of the Add Connector button:
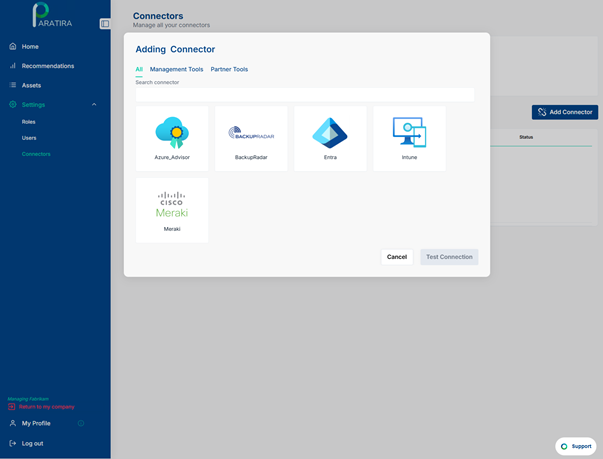
Choose the Intune Connector
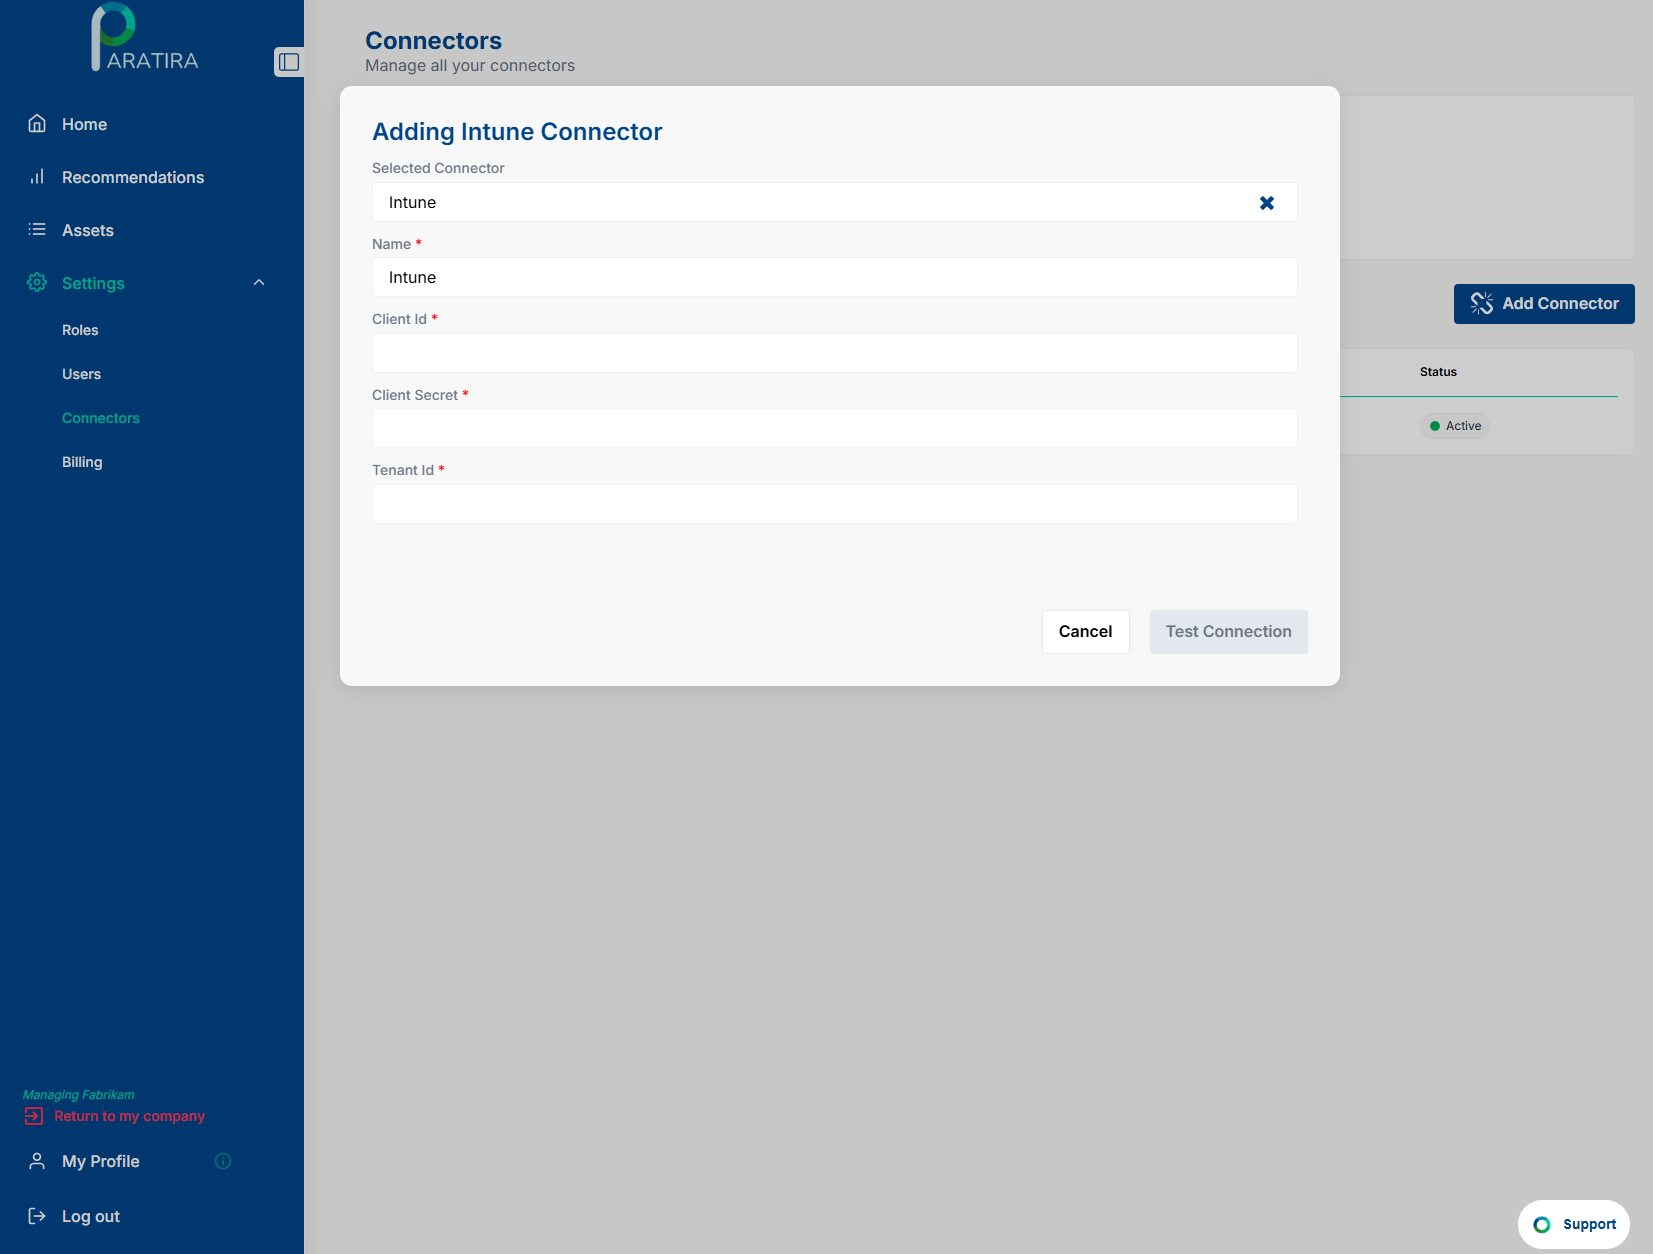
Enter the details in Paratira
Enter the following details to complete the onboarding process in Paratira:
- Name: Enter a name for the connector e.g. Intune Connector
- Client ID: Enter the details you created in Step 3
- Client Secret: Enter the details you created in Step 4
- Tenant ID: Enter the details you identified in Step 6
- Click Add New Mapping
- Enter the Tenant ID that you copied earlier and the select the customer that you want to associate the connector with
- Click Add
- Once all details have been entered a new icon will appear called "Test Connection"
- Paratira will load the Validation Results and process the API endpoints associated and validate the data permissions have been configured correctly. This process can take few minutes to complete
- Once the permissions are completed click Next to proceed