
Setting up the Cisco PXP Connector
Prerequisites - Cisco Portal Access and API Setup
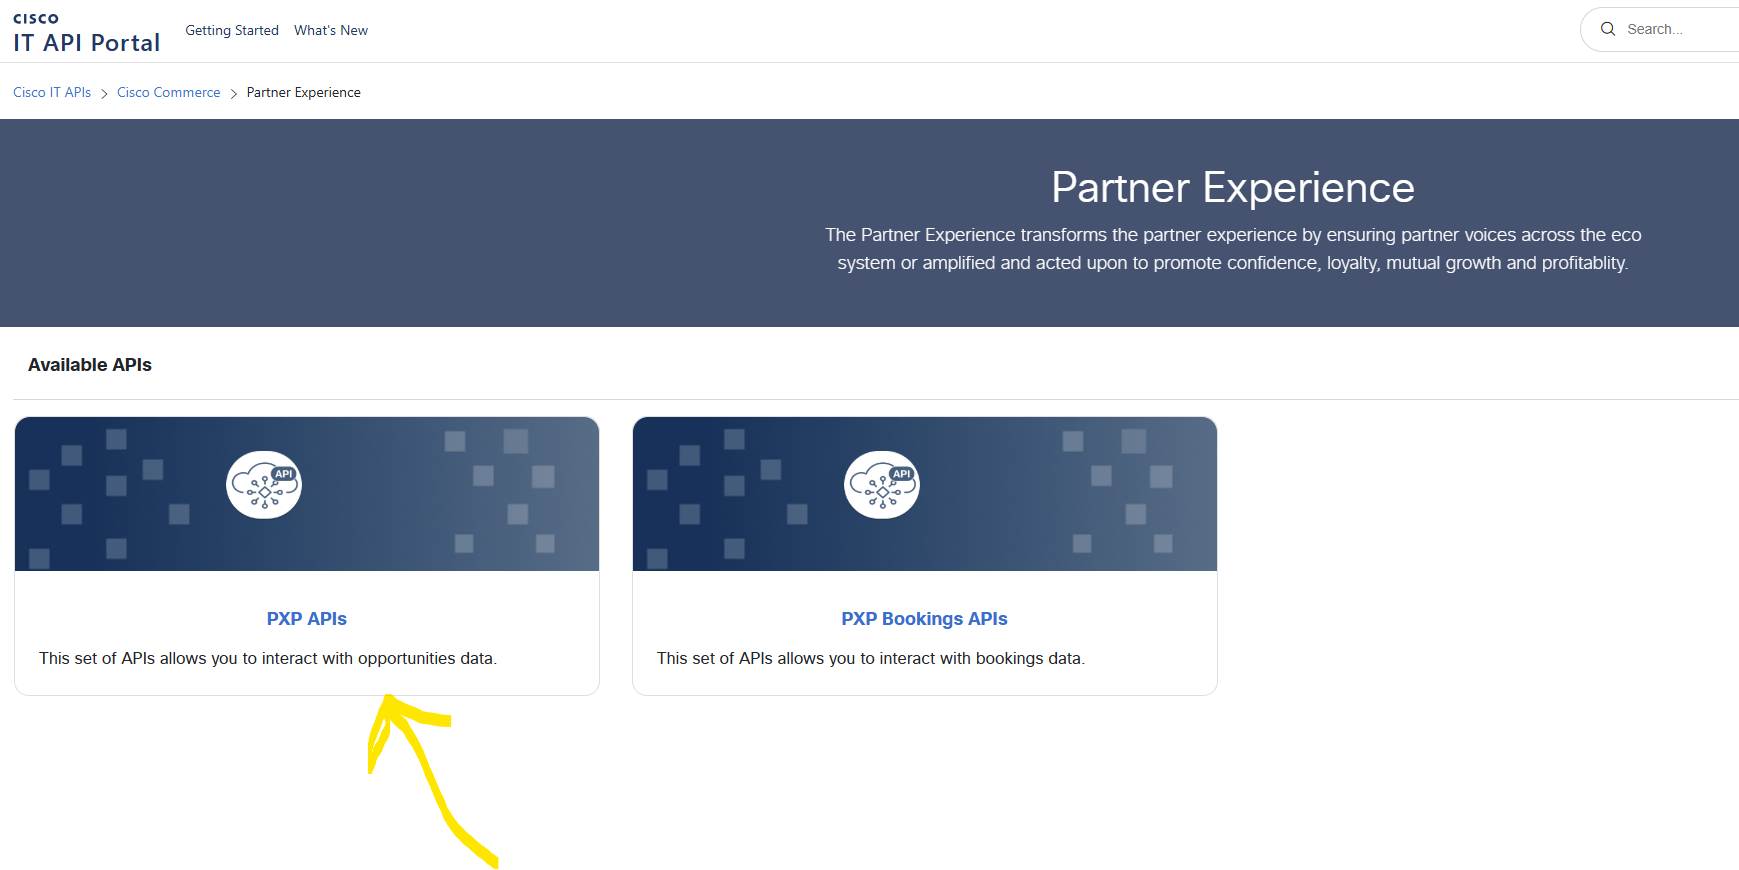
1. Visit the Cisco PXP Portal at: Cisco IT API Portal
2. Select the PXP APIs Option:
3. Click on Request Access:
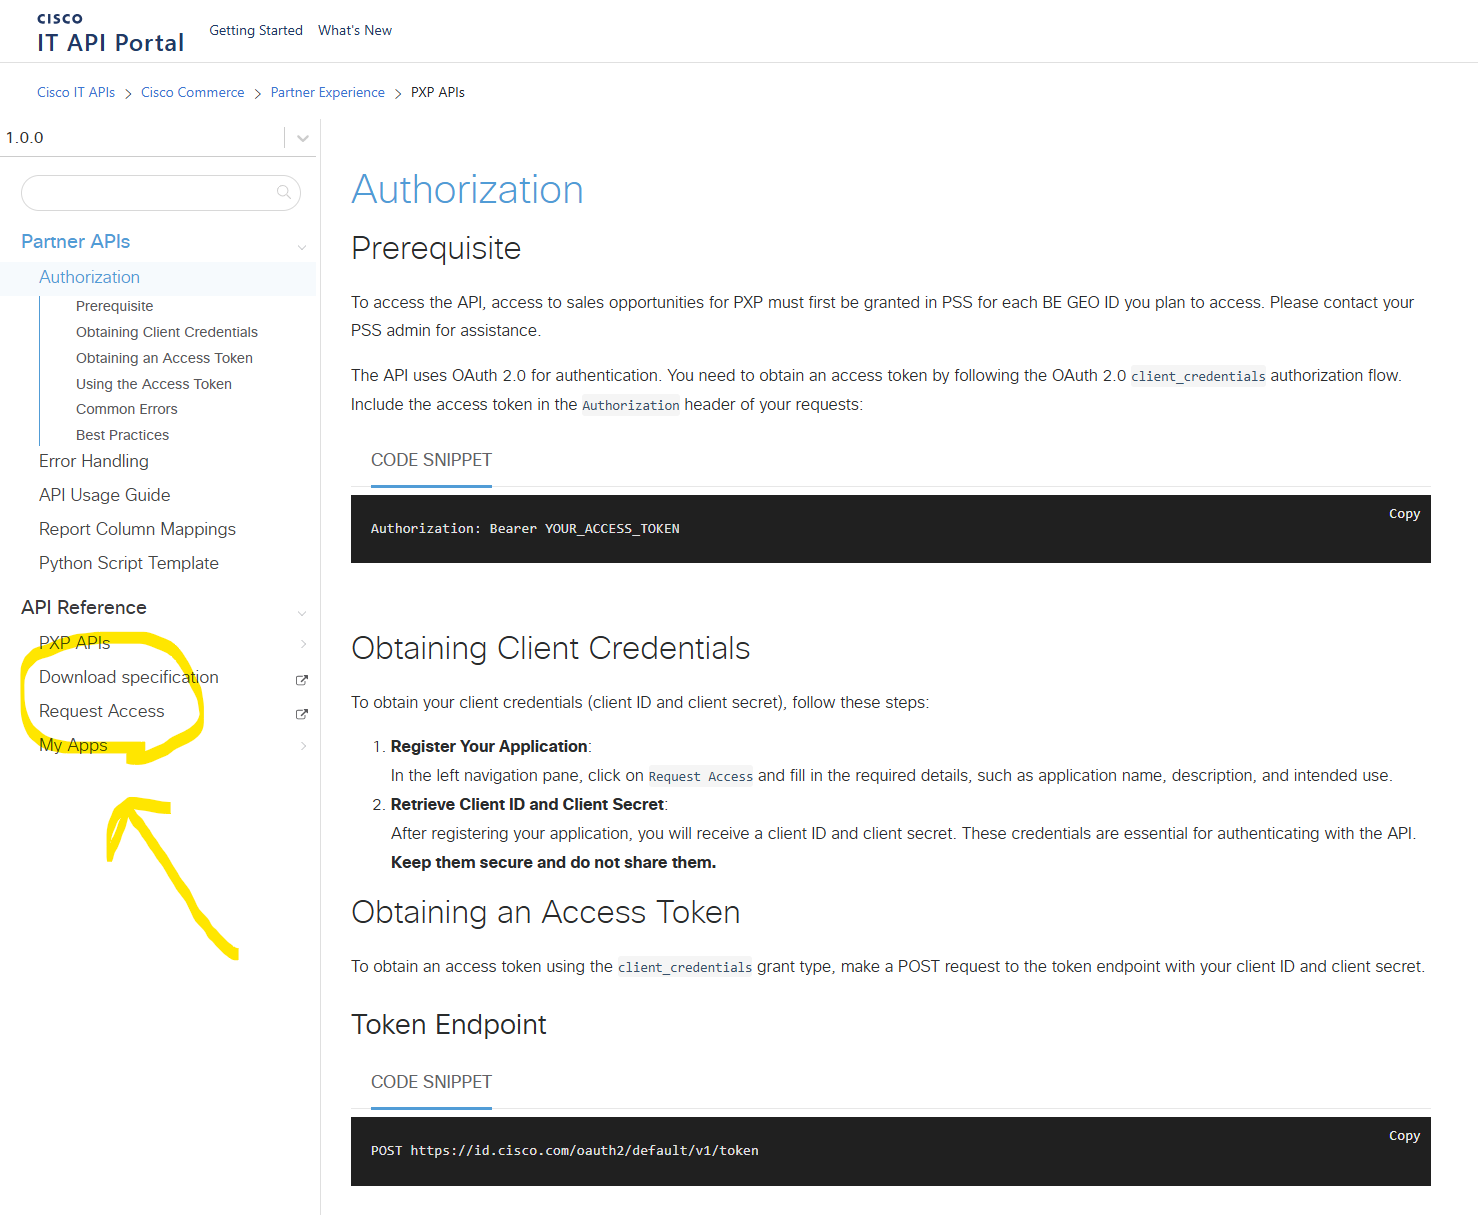
4. Create the Application by performing the following steps:
- Enter an Appropriate name like ‘PXP Integration’
- Select Application Type = API
- Click on the Generate Client ID and Secret Button
- Save these for later but will not be active until the next step is completed
- Click on ‘Save Changes’

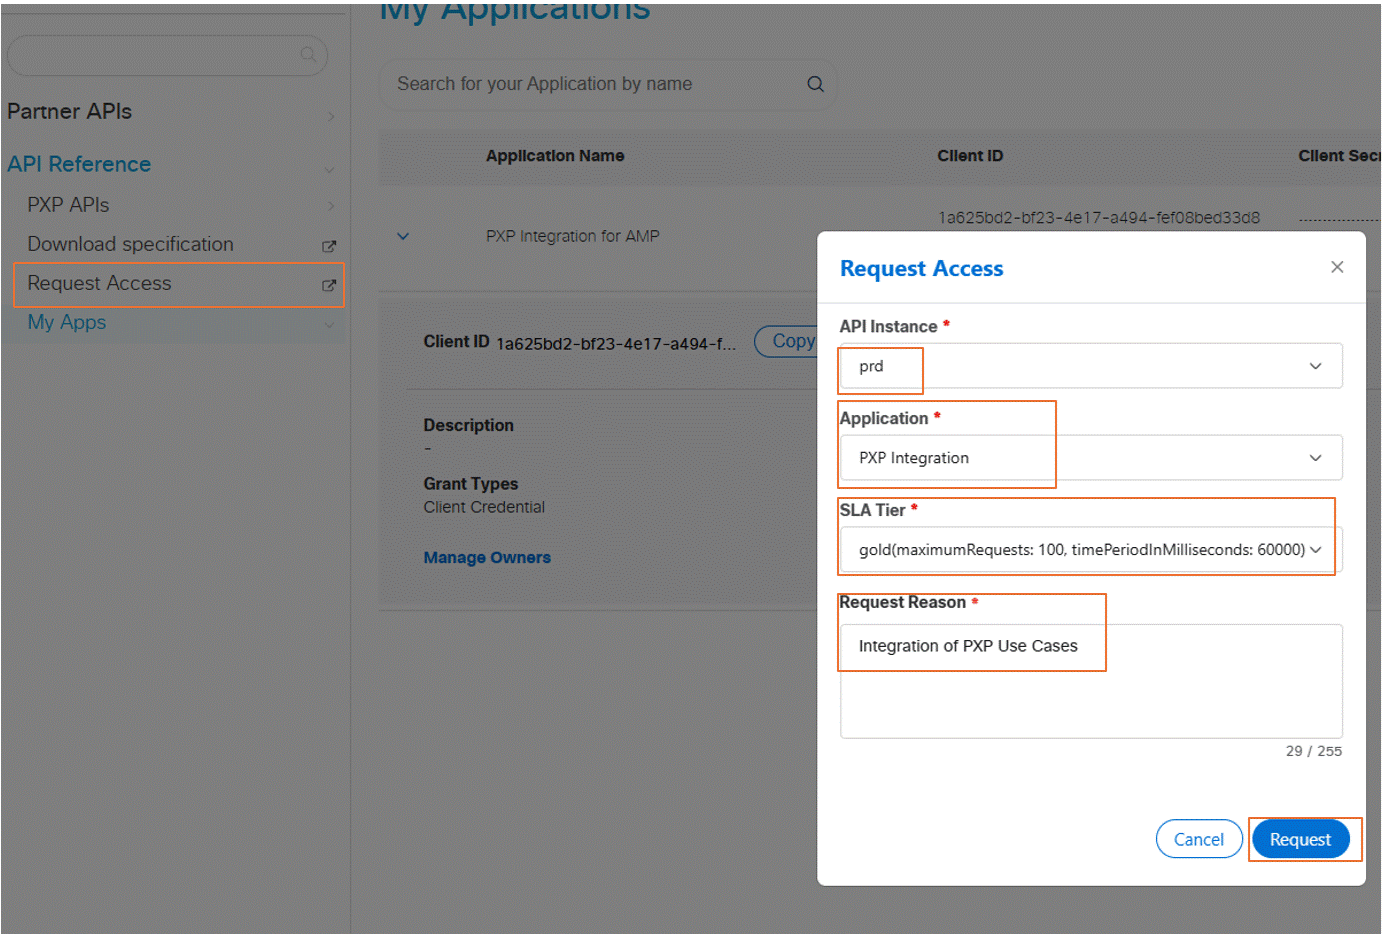
5. Obtain Approval for Application
- Click on ‘Request Access’ again
- For ‘API instance’, select ‘prd’
- For Application, select the Application name you created in Step 4
- For SLA tier, select ‘gold’
- For Request Reason, provide an approval reason for the request.
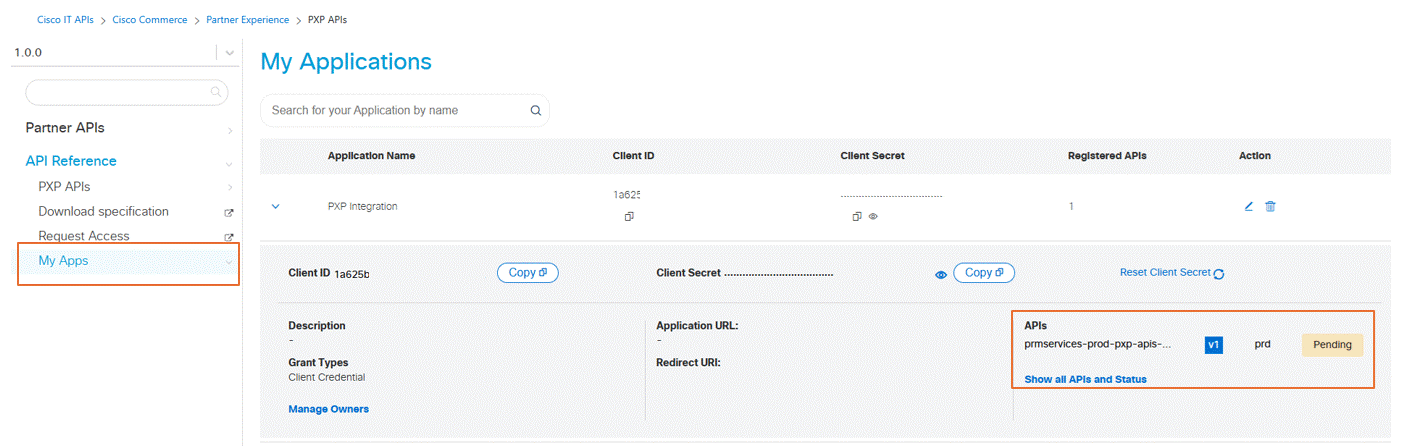
6. Monitor API for Approval
- Click on ‘My Apps’ and select the App you created in step 4
- Monitor the API Status
- An email concerning approval may also be received to the CCO ID used to create the App
- Until approved, the API will not work yet.
7. Write down the:
- Client ID from the Cisco Portal which maps to the API ID field in the Paratira Platform
- Client Secret from the Cisco Portal which maps to the API Key field in the Paratira Platform
8. Log into the Cisco PXP Platform, navigate to the Sales Opportunities tab to identify the Customer Id:
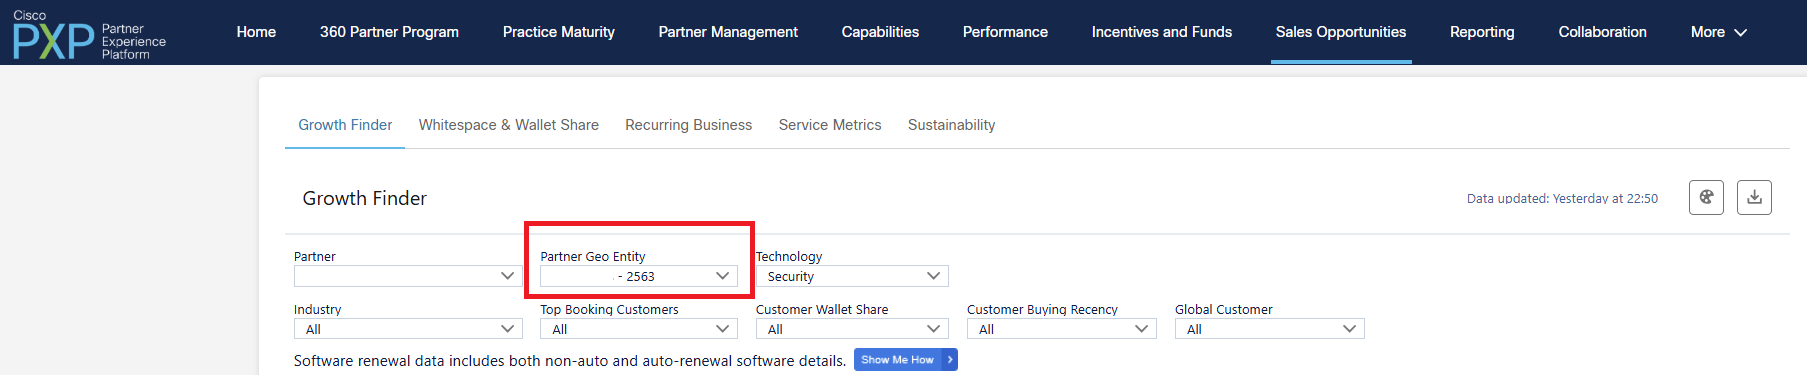
Write down the Customer Id that you wish to setup in the Paratira Platform.
Step‑by‑Step Connector Setup in Paratira
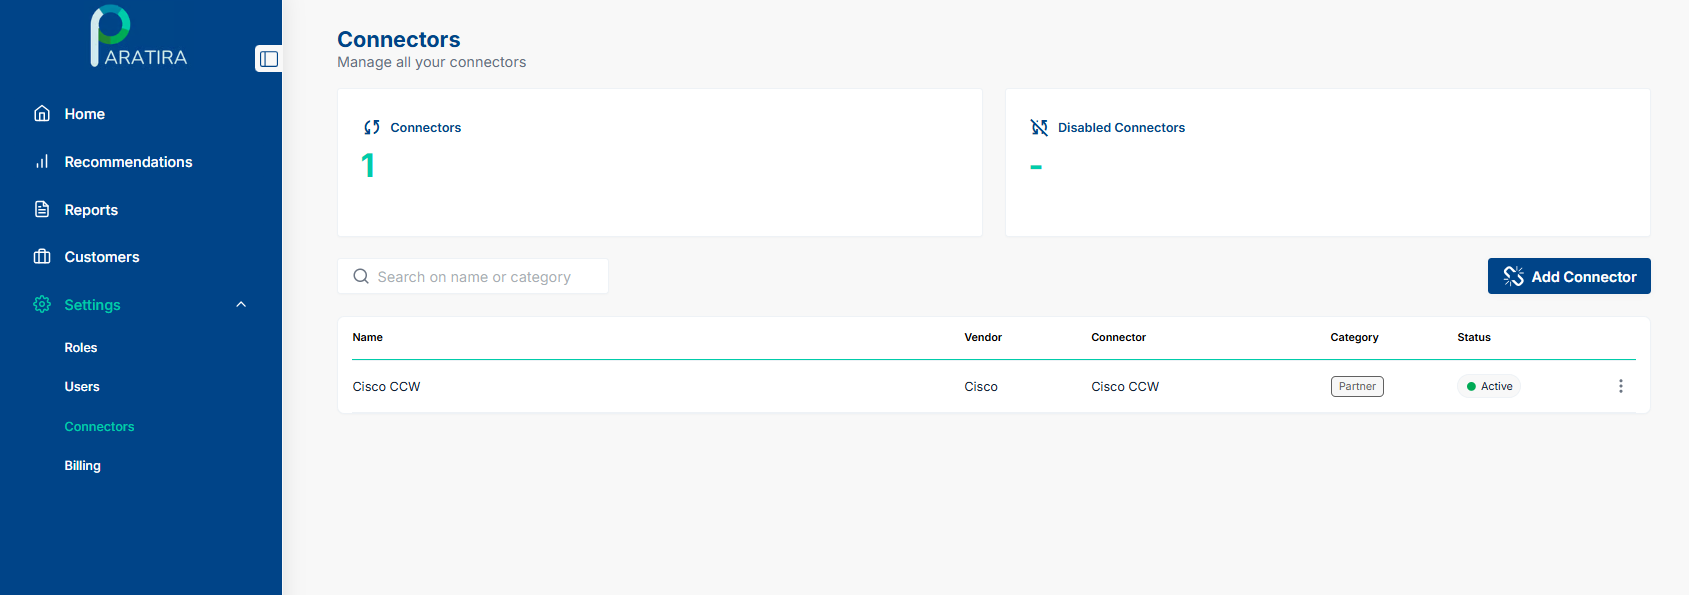
Step 1: Log in to Paratira
- Go to Settings then click Connectors
- Click Add Connector
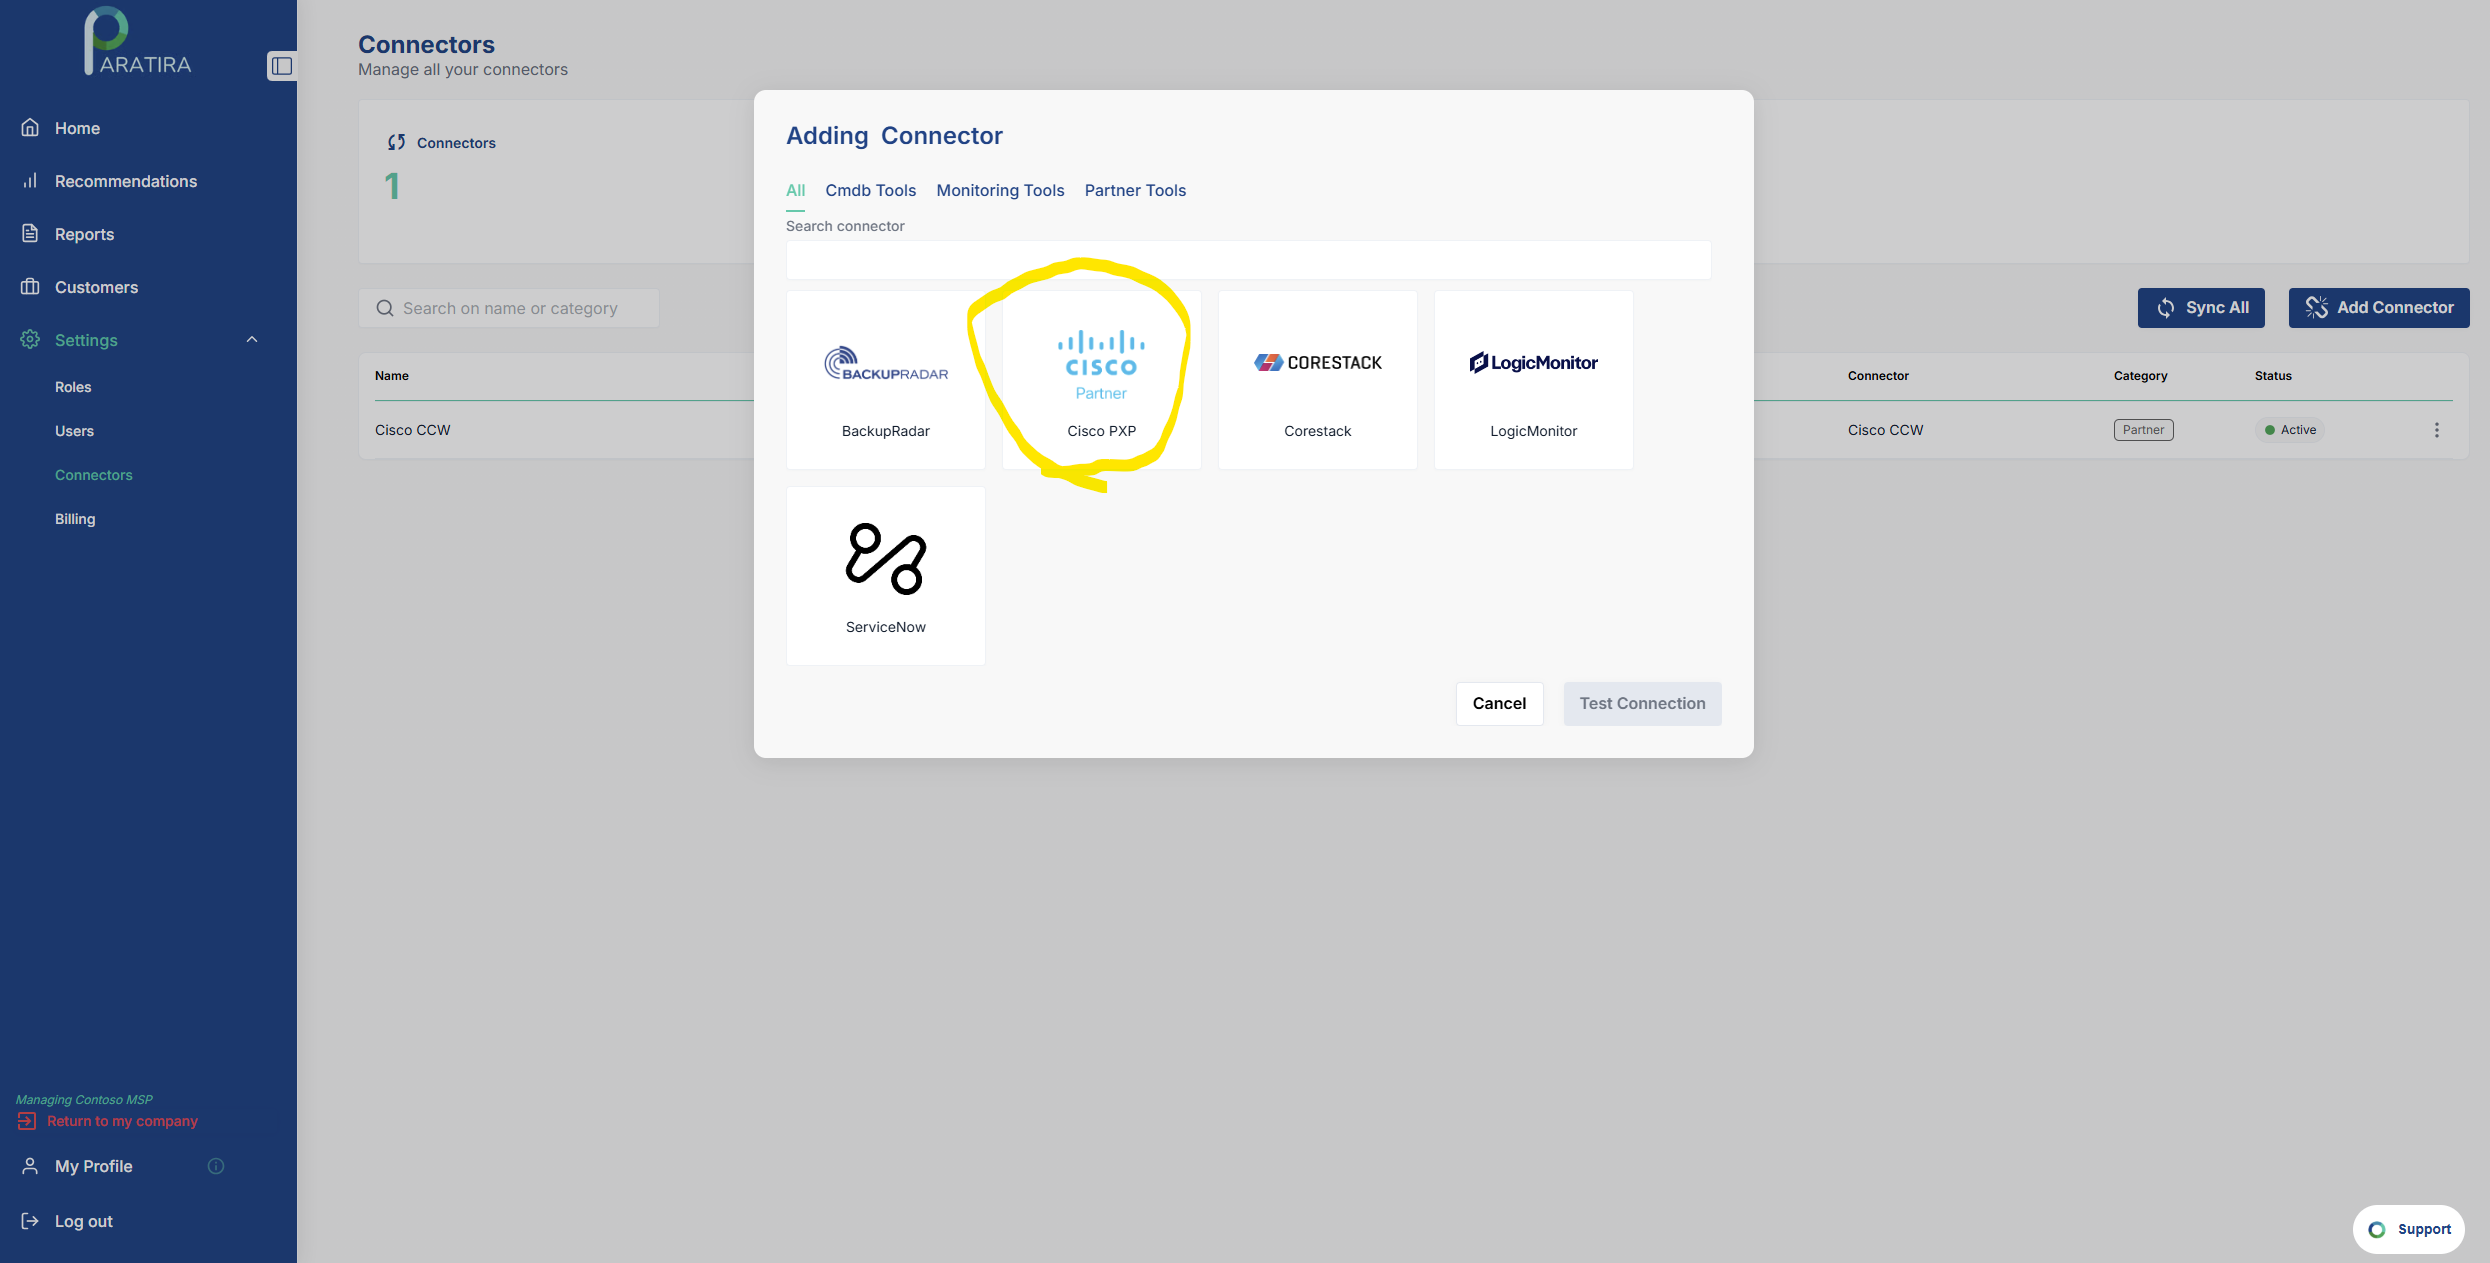
Step 2: Select Cisco PXP
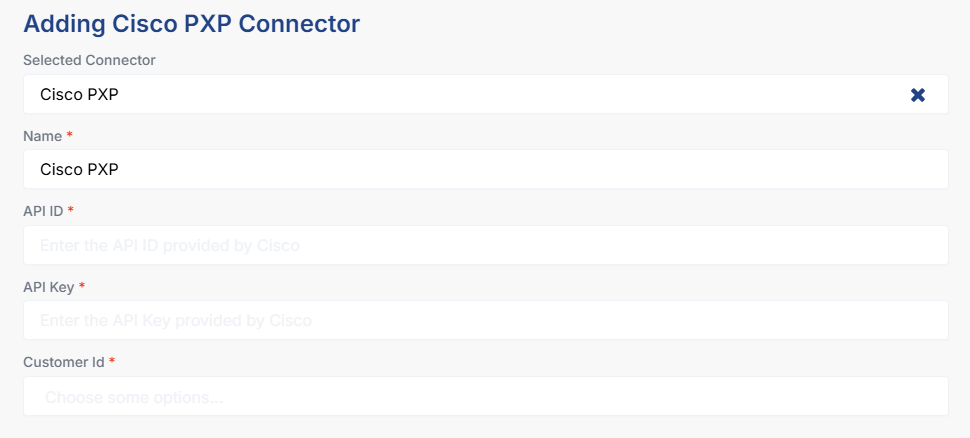
Step 3: Enter Connector Credentials
Using the credentials generated in the Prerequisites section above, enter the following:
- Name: Any friendly name of your choosing e.g. Cisco PXP
- API ID: paste your client ID retrieved from the Cisco Portal
- API Key: paste your client secret retrieved from the Cisco Portal
- Customer Id: paste your customer id retrieved from the Cisco Portal
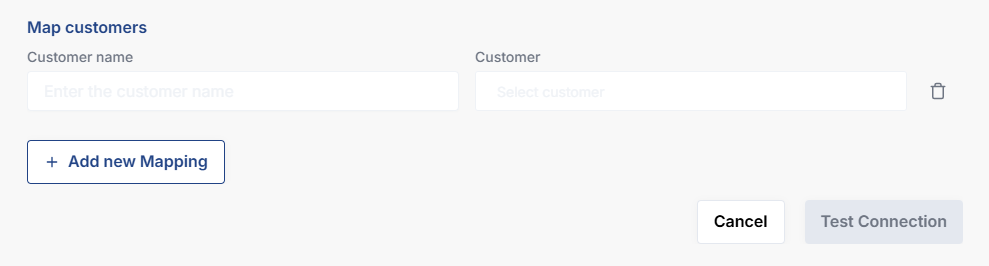
Step 4: Add Customer Mapping
- Log into Cisco PXP portal
- Note the Customer name as defined in Cisco PXP
- Note the Customer profile as defined in the Paratira Platform
- Map the Cisco Customer name to the Paratira Customer Profile
- Click Add new Mapping to map additional customers
- Once completed, press "Test Connection"
Step 5: Test Connection
- Paratira will validate API access
- This may take a few minutes
- If successful, click Next
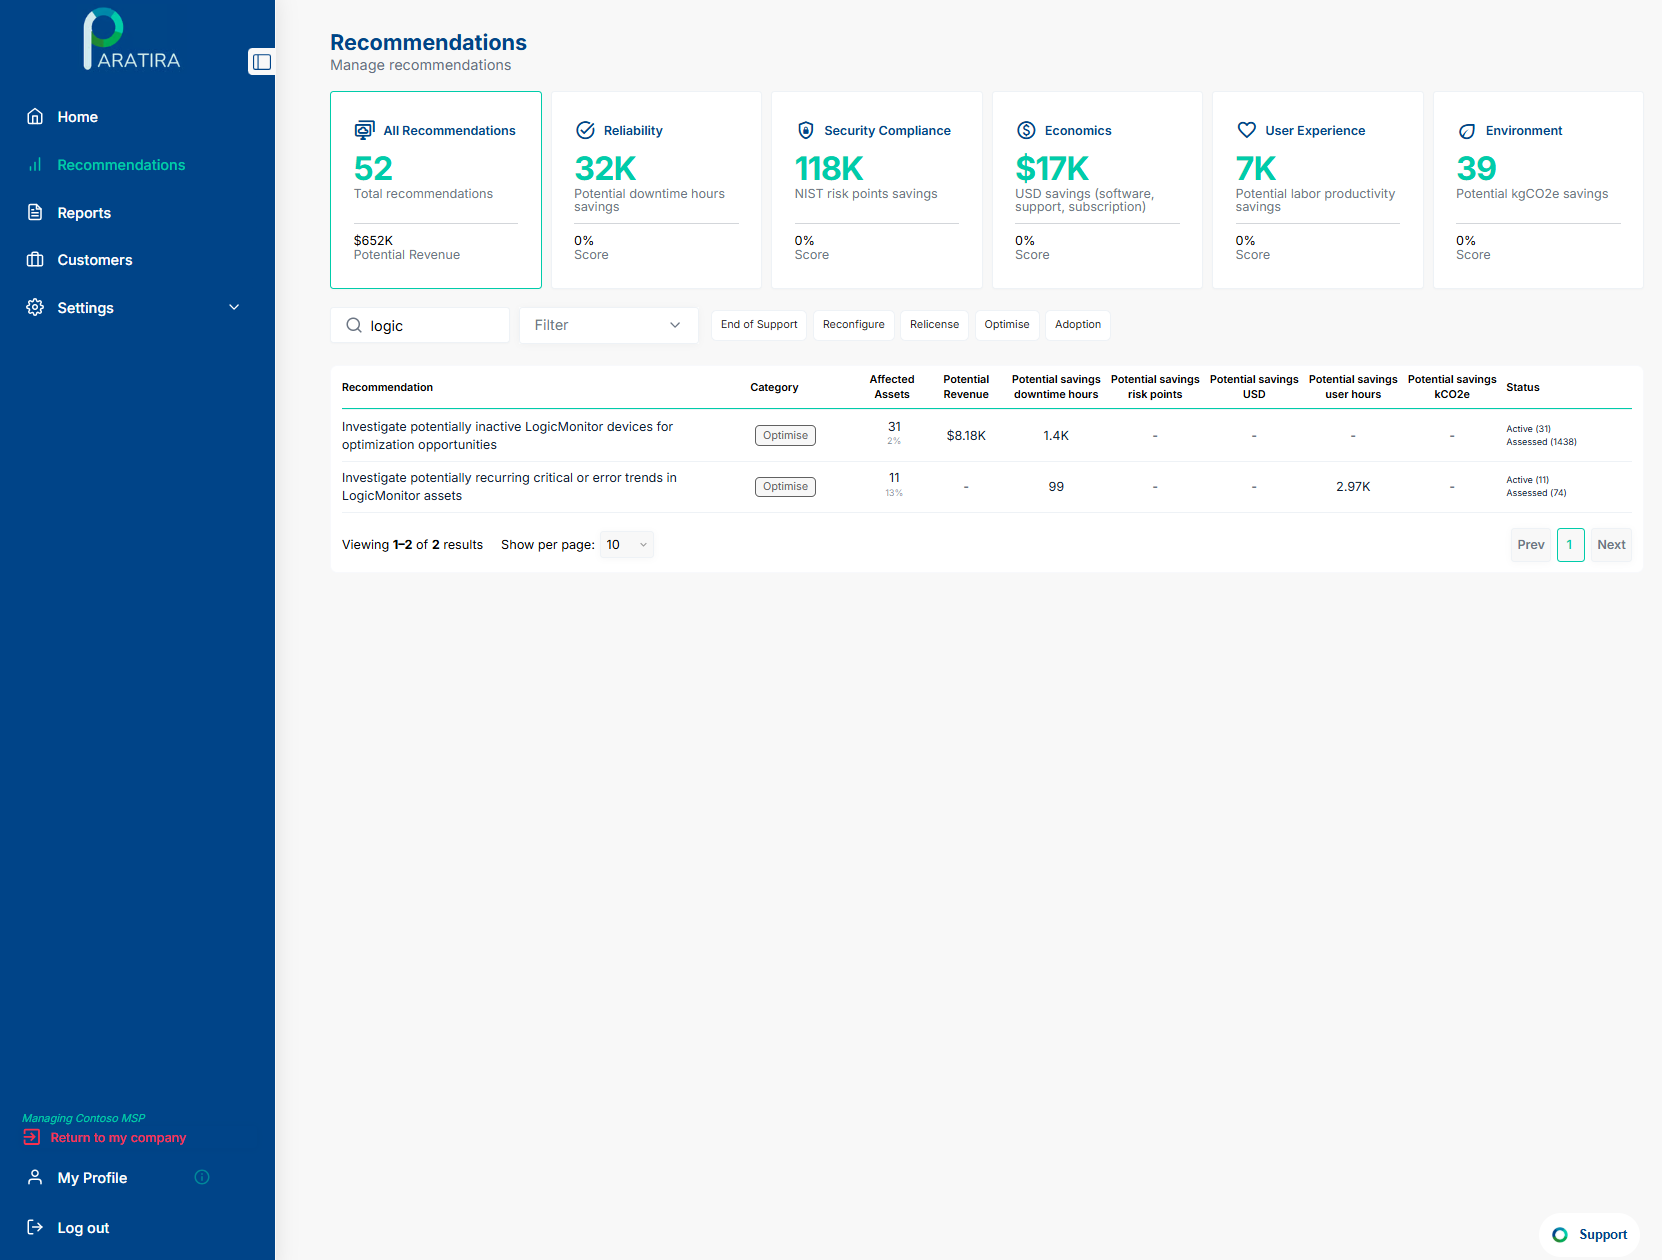
You can validate a successful Cisco PXP connection by viewing the Recommendations tab after 24 hours.
You should also be able to populate a Provider/Partner Insights Report
For additional assistance with setting up your Cisco PXP connector, email: sanjay.subramaniam@raioam.com